

android studio app design template
Introduction
In this article I will explain creating template for a very simple architecture which follows MVVM with data binding. To make it simple, I have excluded all complex logic like dependency injection from this example.
I have a BaseActivity and a BaseViewModel under the core package.
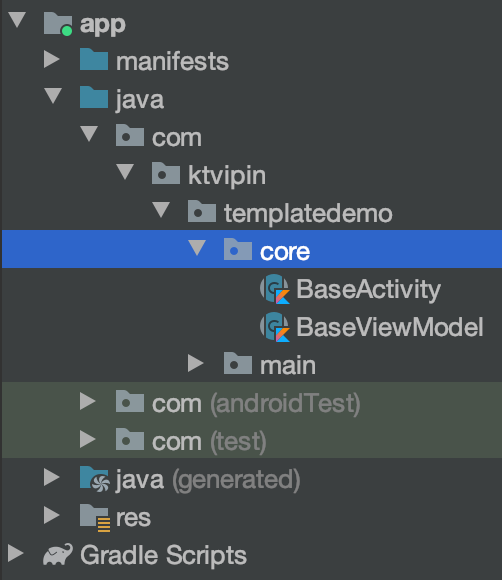
The BaseActivity is responsible for initialising the view model, data binding and binding the view model to the layout file.
The BaseViewModel is simple and has only two methods.
The activities derived from BaseActivity has to override two variables, layoutId and viewModelClass. After that, the activity can access view model by using the variable viewModel and binding class using binding variable.
The layout xml file also need to be changed to use data binding like below.
As you have seen, to follow the architecture we have to write boilerplate every time we are creating a new screen. This is a time consuming as well as boring work.
In this article we will create a template which will generate an Activity with a ViewModel and a layout xml file, all following the architecture above.
Before starting, copy the Base classes to the core directory under your root package.
Let's Get Started
Open Android Studio's template directory.
In Mac :
/Applications/Android Studio.app/Contents/plugins/android/lib/templates/ In Windows :
{ANDROID_STUDIO_LOCATION}/plugins/android/lib/templates/ There you can see a set of directories for the pre-packaged templates.

Create a folder for your template.
Create a directory and name it with your template name, I am creating this under the activities directory and naming it as AppActivity.
activities/AppActivity/ Create files and folders
There are some files & folders which plays major role in template creation.
-
templates.xml— Represents how your template screen should look like. -
recipe.xml.ftl— The container box where all your template files (.ftl) are ready to evolve into Android code files (.kt, .java , .xml) based on your checks, logic and id defined intemplates.xml -
globals.xml.ftl— The place where you keep all your directories, path and package structures as variables. -
root/— The place where all files containing the code of your template will be saved.
Create these files and copy paste the code.
templates.xml
Each <parameter> will create one user input field. Most of the attributes are self explanatory .
type decides what type of input should be created.
- string —
edittext. - enum —
dropdown/spinner. - boolean —
checkbox.
recipe.xml.ftl
This will give commands to transform files in the root/ folder into new files. Some commands that you can use include:
-
instantiate— This will create new files based on the user inputs and code in the template files inroot/folder. -
merge— Merge the contents of one file into another. -
open— Open files that have been generated byinstantiate.
globals.xml.ftl
We will keep this file empty as we are not using any variable for this template.
root/
Now we can create some files and folders inside the root directory.
Create files for activity, viewmodel, layout, strings and manifest. The final file structure will look like,

Copy code from below and paste in appropriate files.
Rather than creating all files (like AndroidManifest.xml.ftl), you can even reuse some file from activities/common.
Done! We have successfully completed all the steps for a template creation.
Let's see the magic
Now open Android Studio (restart if you have already opened).
Open the project and and right click on the package where you want to create your new AppActivity.
Select AppActivity from the templates menu.
New->Activity->App Activity 
On selecting AppActivity, the template dialog will popup with the input fields which we have configured in template.xml.

Change the values as per your needs and click on Finish.
Multiple files will be created and all the files will be compatible with the architecture.
You can also see that the Activity will be added to the AndroidManifest.xml with a label referred from strings.xml.
Wrap Up
The goal of this article is to give you a quicker idea of creating templates using Android Studio's template engine (FreeMarker). Creating custom template will help to reduce writing boilerplate and to follow common standards and practices across the team.
The architecture used was very basic and may not have included proper configurations. Please change the code as per your requirements.
All the code mentioned in this article are available on my GitHub repo:
References
- https://freemarker.apache.org/
- https://riggaroo.dev/custom-file-template-group-android-studiointellij/
- https://medium.com/androidstarters/mastering-android-studio-templates-ed8fdd98cb78
android studio app design template
Source: https://proandroiddev.com/accommodate-your-project-specific-needs-with-custom-templates-46cfdccc8363
Posted by: petrusnich1967.blogspot.com
0 Response to "android studio app design template"
Post a Comment